
Intraoral Radiographs
Paralleling Technique – Keys to Success
Sensor holder – mesial-distal position
- Centered on contact to be opened (see “Image-specific contacts to open” below)
Sensor – intraoral position (to ensure parallel to root)
- Maxilla – must be near the center of the palate (i.e., NOT touching the teeth)
- Mandible – as far medial towards the tongue that is tolerable by the patient, especially in the presence of tori
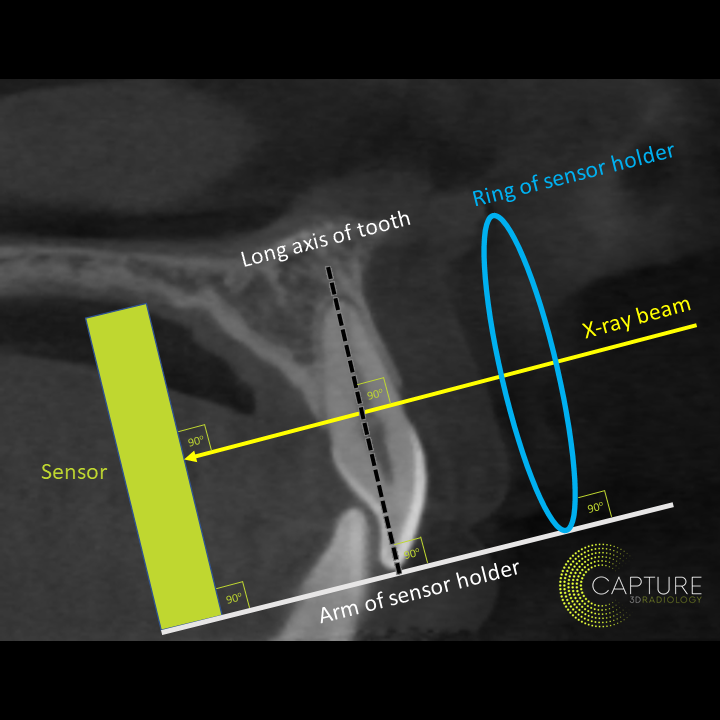
X-ray beam – horizontal angulation
- In line with embrasure angle of contact to be opened (see “Overlapped contacts” below)
Position Indicating Device (PID) (i.e., Collimator or “Cone”)
- Edge is parallel to sensor holder arm and end is flush with ring (see “Armamentarium”)
Foreshortening and Elongation – Errors in Paralleling Technique
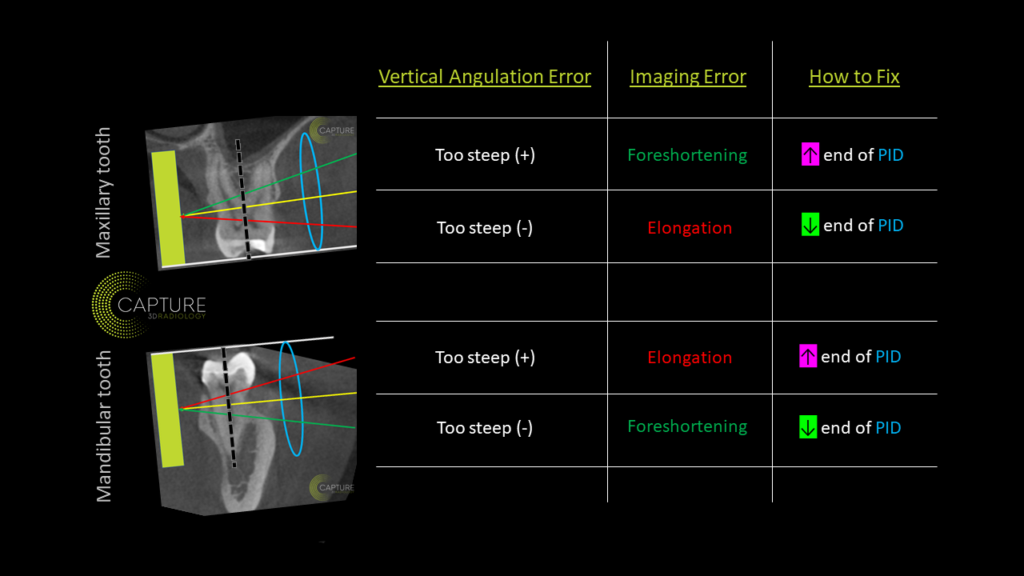
- Yellow line = correct Vertical angulation (perpendicularly intersects long axis of the tooth)
- Note: Positive (+) angulation indicates downward trajectory
- Note: Negative (-) angulation indicates upward trajectory
Quality Assurance
Periapicals
- Include apices and bone 2mm beyond
Bitewings
- Include 2mm beyond alveolar crest
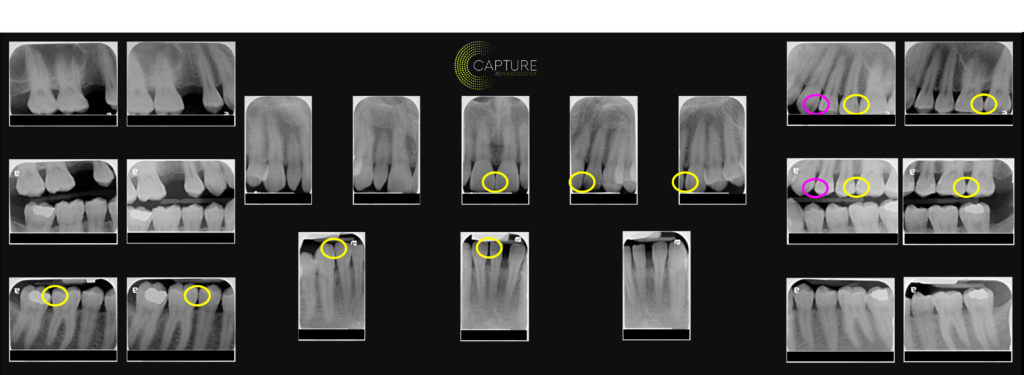
Image-specific contacts to open
- Yellow = centralized contact – a function of proper x-ray beam horizontal angulation
- Pink = distal canine contacts – a function of proper mesial-distal positioning of the sensor
- Note: mirror contacts to contralateral side as needed
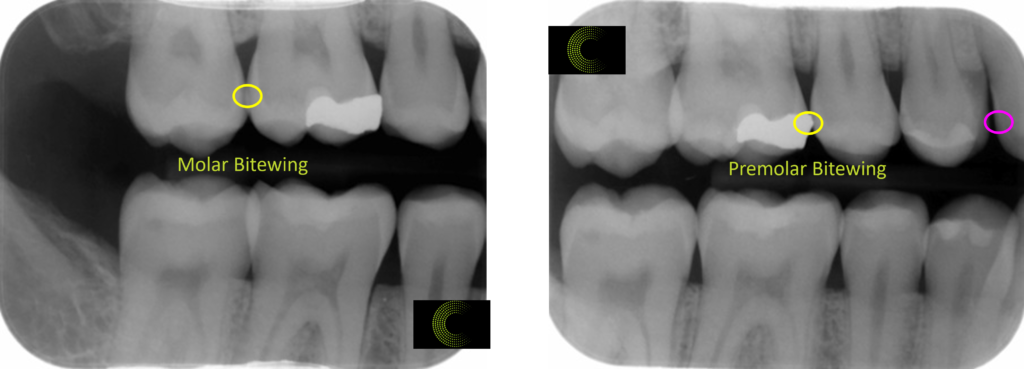
What defines an open contact?
- Caries can be reliably diagnosed if the overlap is less than ½ the thickness of enamel, which is the case for the 2nd and 3rd molar contact in the molar bitewing below
Overlapped contacts – Errors in Horizontal Angulation
- Horizontal angulation is the mesial-distal angulation of the x-ray beam (blue arrows)
- Contacts will be opened if the blue arrows mimic the green lines – buccolingual embrasures that as you move more distally along the arch, generally become more distally angled
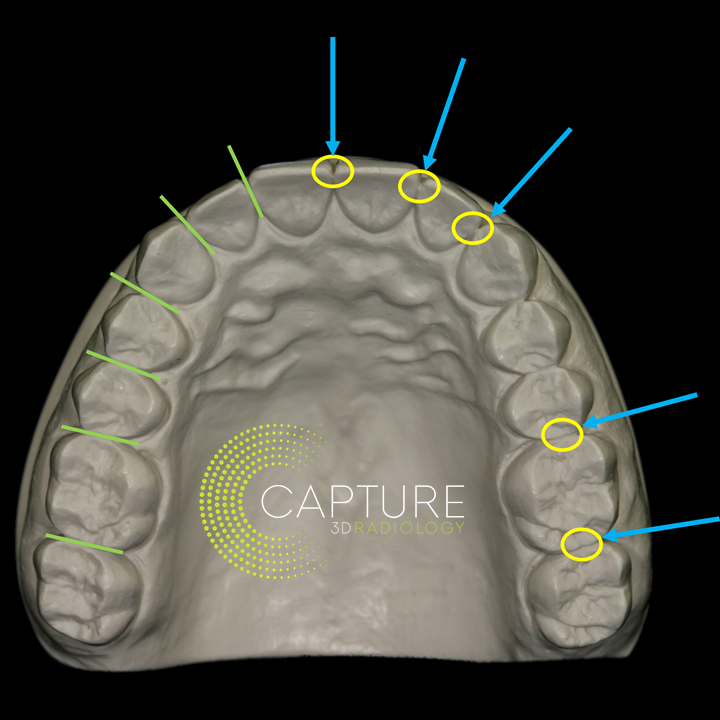
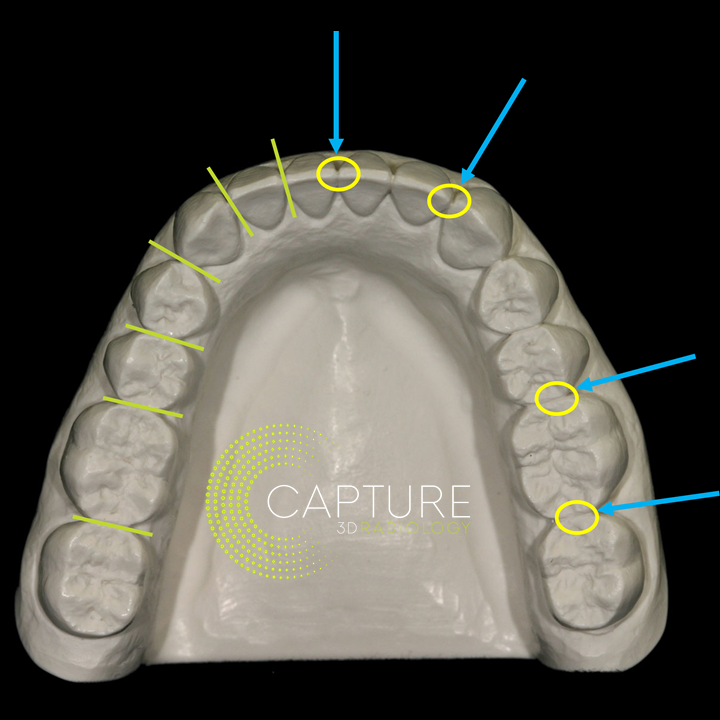
- Yellow circles are contacts to open in a full mouth series
- Note 1: These are idealized contacts – real life is not so easy, so one must look and adjust accordingly
- Note 2: Big assumption is the incoming beam is perpendicularly hitting the sensor located lingual to the teeth – a feat made easier if a sensor holder is used properly (see Paralleling Technique section)
Armamentarium
Sensor Size
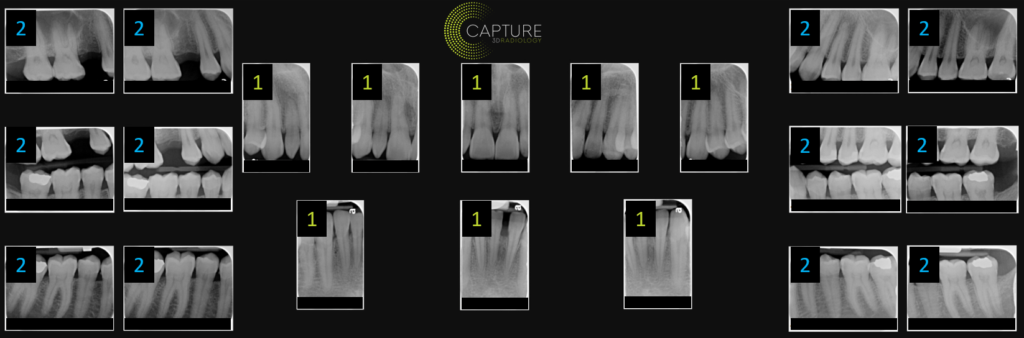
- Size 1 sensors are recommended for the anterior periapicals images due to narrower space availability in the anterior palate and floor of the mouth
Sensor Holder
- Consists of holder, arm, bite tab, and ring
- Ensures paralleling of sensor and ring
- Note: Paralleling Technique not guaranteed unless the sensor is also placed parallel to the long axis of the tooth (see “Paralleling Technique” above)
Indications
Periapicals
- Identify root morphology / pathology
- Endodontics
Bitewings
- Interproximal caries and calculus
- Restoration overhangs
- Identify periodontal bone loss
- Confirm crown seating
Vertical Bitewings
- Assess previously identified periodontal bone loss
- Confirm implant crown seating

Help Center
Check out the Help Center for Instructions and FAQs.
Community Impact
Help us give back by suggesting causes that matter to you.
Contact Us for Support
Have a question the Help Center did not answer?